A garden is a love song, a duet betweena human being and Mother Nature.

Thursday, July 14, 2011

The Making of a Wagon Garden

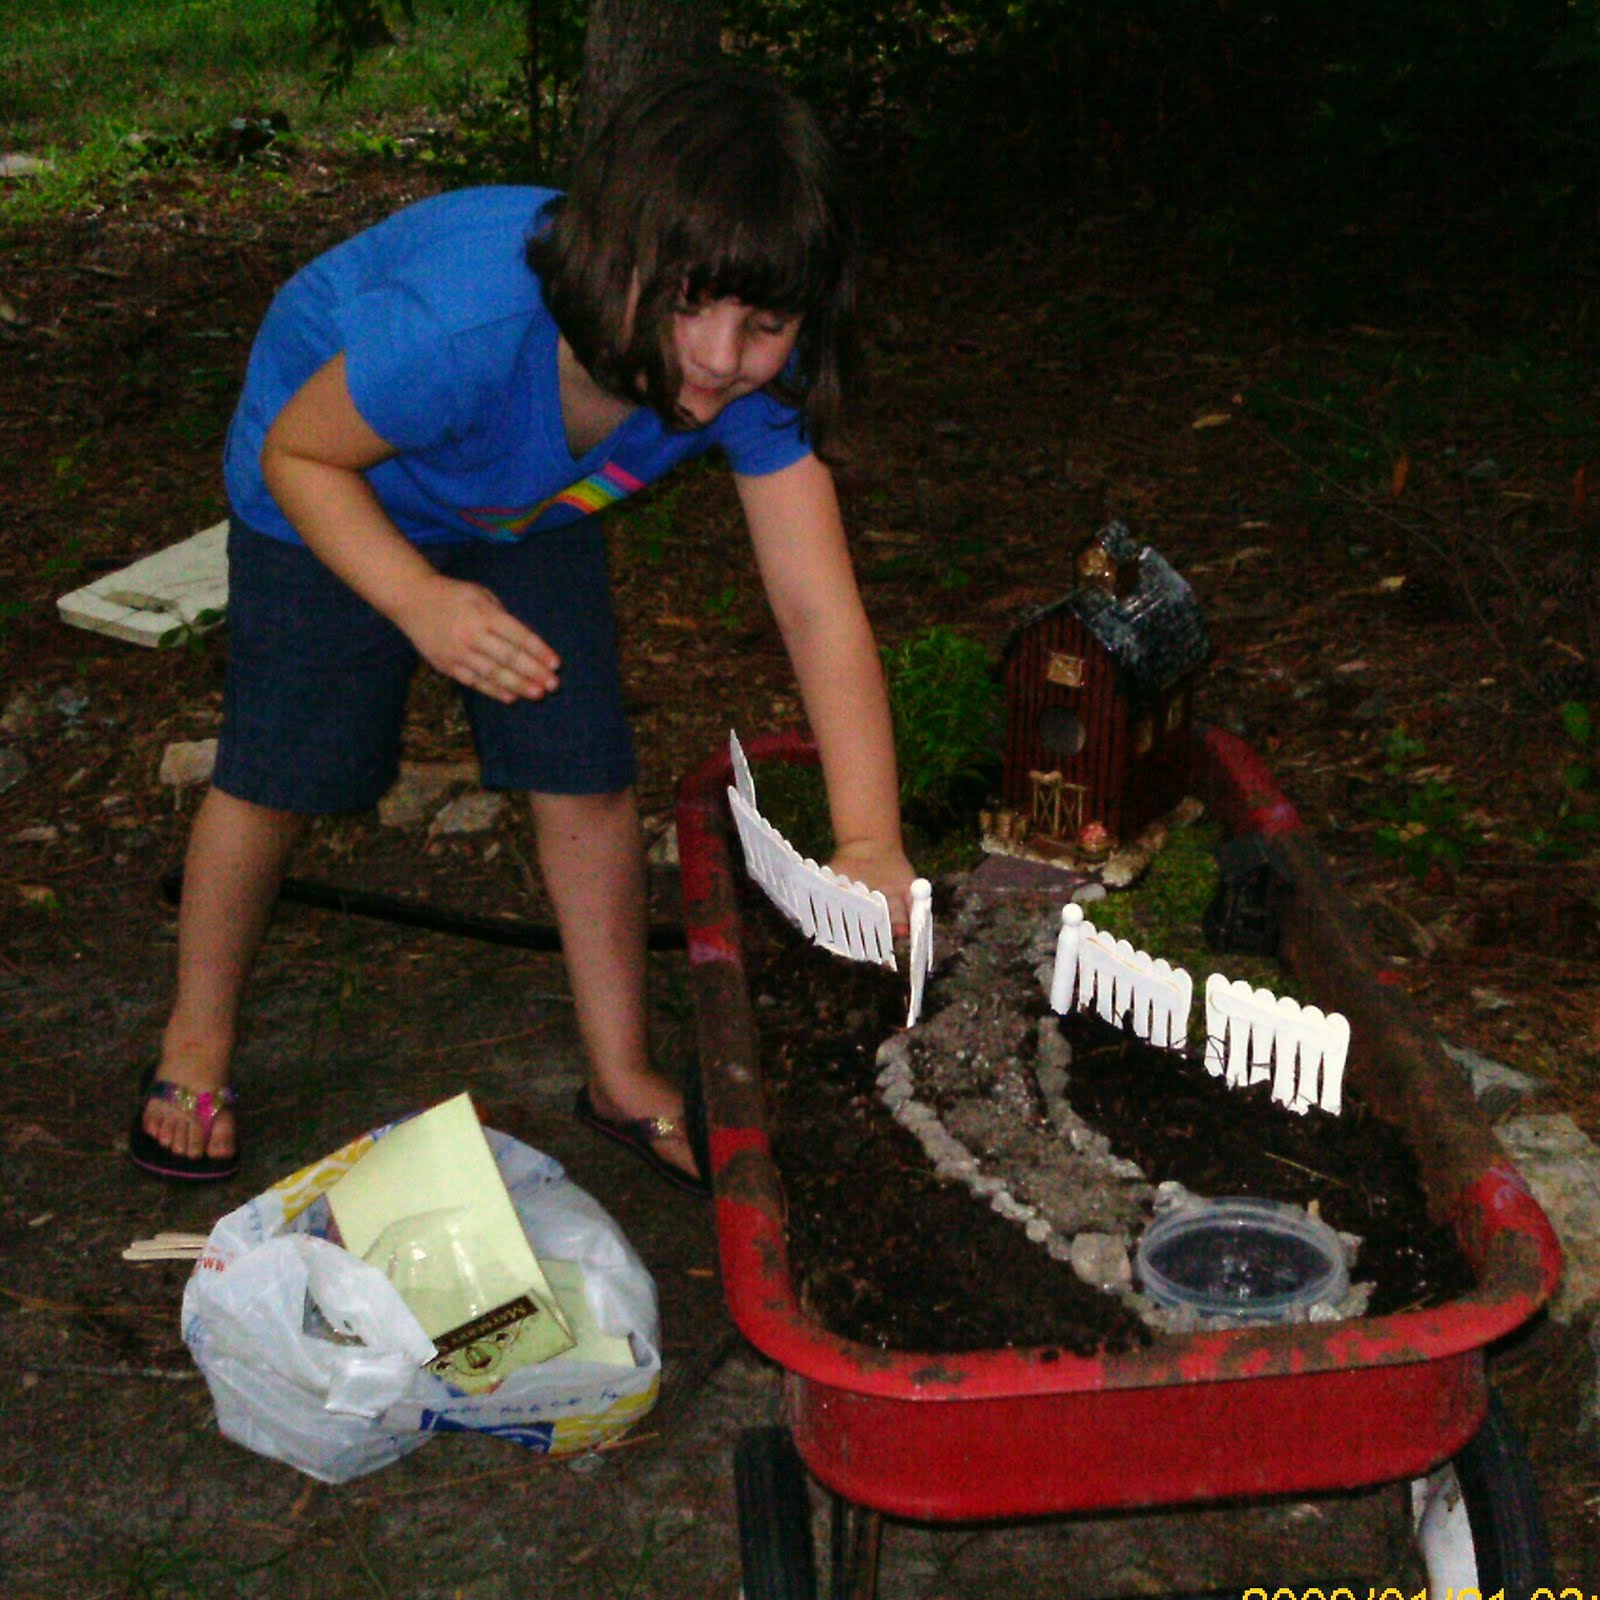
A fellow gardener and online friend inspired this project. She had made an inspiring wagon garden and after Trinity and I stopped drooling we got to work.
Can you see Trinity in the back Swinging?
First we chanced by a sale at Hobby Lobby and got all the neat little miniatures...of course we were just there for the wooden sticks for the fence along with some white paint...and get this the paint was called "Garden Gate."
Trinity was awesome with the moss. She made it all fit together and patted it with her sweet little hands.


Trinity's hands...pat...pat...

She and I had been needing a good Girly project that didn't include glittery nail polish. It took us two days to apply several coats of paint. She was an expert at placement, I kept my know it all adult opinions to myself and let her guide the project...as you can see it is lovely...I guess we adults don't know everything after all.
Found a new use for my bird house barn


To visit Sue and her unbelievable garden...yes I am still drooling...and you will too...visit her here http://suesgardenjournal.blogspot.com/ be sure to take a napkin to wipe your chin.


With all That I Am
Carrie "Forrest-Dweller" Duvall

Friday, June 17, 2011

Drying Hydrangea's


Its amazing how cool these look...when its in the 90's...

My Lovely little hydrangea garden has brought me much pleasure over the years...The flowers Open up in June and go through a myriad of color.

I have enjoyed cutting, drying and crafting with these lovelies...
So I thought I would share the best way I have found to dry them...I like to do things naturally, if I can...so I let nature do the job for me...I just work very close with her.

Drying Hydrangea's


1. Most important, cut them when they are papery feeling. They kind of rustle when you touch the flour and they may be a bit green around the edges.

2. Cut them the day after a good rain or a deep watering.
3. Strip all the leaves off (Hold it at the neck and pull your hand down the stalk will take the leaves off).
4. Take them inside and take off any brown flowers, missed leaves...just spruce them up a bit.
5. Trim the stalk, do not trim them all the same length they are going to need air while drying.
6. Arrange them in a container of water making sure there is good air flow (this is why you trimmed them at different lengths)
7. Place them around the house away from direct sunlight and any AC vents.
8. Do not water again unless you cut them fresh.

9. Now have fun decorating or making gifts.

I would love to show photo's of my house right now...its all Blue! But alas my camera is not working...heading out to camera store for repair!

Thursday, June 9, 2011

Birds In The GArden

As I was checking out my Grapes I found a special friend moved in.....


Mrs. Robin didn't care for how close I got to the nest. And she has quite upset the squirrels path to the bird feeder as they can go from home to the bird feeder (AKA Squirrel feeder) via the grape trellis. But she doe's have first dibs on the grapes hanging in her nest when they ripen. Such is the life at our little cottage.

Monday, May 2, 2011

Pest and Fungus Plant Treatment


Natural and Cheap Bug, pest and fungus treatments
I want to share what I use on my plants both indoor and out.
These sprays can be used in unison with the other.
First the alcohol: It will weaken any waxy protective coat the bug will have, and even dry up a few.
Follow up with the cooking oil a few days later it will finish them off.
I do not spray plants that I see natural pest control going on.  If you see aphids look close is there a black soft beetle looking thing with red spots?  This is a larva to the ladybug and they live off of aphids.  Other great helpers you want to keep an eye out for and not spray.  Praying mantis, spiders and lace wings.

RUBBING ALCOHOL
1 Spray Bottle
Water
Rubbing Alcohol
Combine 1 cup of rubbing alcohol to 1 quart of water. You may want to spray one leaf and wait a day then check for damage. You can use less alcohol on delicate plants.

KILLER COOKING OIL
1 Spray Bottle
Liquid dish detergent
Vegetable cooking oil
Combine 1 Tablespoon of the detergent 1.5 teaspoons oil with 1 cup of water. Test this as well.
For cabbage, cauliflower and squash use just soap solution as it will burn. (Killer cooking oil is great on houseplants that have spider mites)

ANTS 
Are my next target...remember "Kiss my grits?" Well that's exactly what you are going to tell the ants. They don't have a digestive system. The Grits expand and well...they explode.
This is just not a one time deal. You can sprinkle this directly on the mound. Or you can put it in the spreader along with sand. My Son loves doing this.

Or you can send the Ants to War with each other. Take a shovel from one mound and put it on the other. They will start killing each other. Ants have a scent that is totally unique to its colony and they smell each other for recognition. Its a little more technical than that, but you get the idea.

FUNGUS AND MOLD
Baking Soda! That's it..just put it in some sort of shaker...the powder sugar shakers are great for this. And put a dusting on the plant. This is very gentle.

Thursday, April 28, 2011

Painting Mushroom Pots


I wanted to share a project that we did as a family a few years ago that we did as a family.

Mushroom Pots

Materials
A wine bucket clay pot  or a tall slim one(I found them at garden ridge for $1.00)
Clay pots that will fit over the wine bucket
Sand
Paint in many colors
A clear coat
Brushes
Stencils
News Paper

Give everyone a clay pot, brushes and paint...and let them have at it!
After they are finished put a clear coat on and let them sit in a garage or covered porch for a few days to set.
fill the wine bucket pot with sand and place your painted pots on top.


Toadstool Tips 
(extra info)
You can also just make a house and set it on the ground like the one at the left.  
To make it easier to paint set it on the wine bucket base.

Tuesday, April 5, 2011

Painted Fairy House Pots


These are fun to make and set around the garden.

Materials
Terra Cotta pots
Polyurethane water base
Several different colors or crafting paint water based
Paint Brushes
Stencils
Sponges
Pencils
A Big Imagination

Instructions
1. Start with clean pots...a water bleach solution will get rid of any dirt and grime. Let it dry completely.

2. Coat all pots with polyurethane and let them dry overnight.

3. Gather the kids, and painting supplies and let the imaginations run rampant.

4. Once the kids and you have completed your creative huts and the paint is dry. Apply two to three coats of polyurethane, letting them dry completely. I know this part isn't as fun, but you have to protect these works of art, especially if you are going to place them in the garden.

Monday, March 28, 2011

How to Espalier


I wanted to share a technique that has been around for hundreds of years.  Espalier is the art of training a woody plant to grow on a flat plane.  This technique creates structure and saves on space as well.

I started two pear trees three years ago.  And I have enjoyed the process of trimming tying and training.  I had to go to allot of web sights and books to collect what little information I could find. There were no direct rules and it was a little nerve racking to get a tree and cut it off. So I will share my knowledge I have collected...but in a simple form so that you can get started with allot more confidence than I had.

What you will need:
Sturdy structure in full sun to grow it on
Tree (dwarf whip)
Bucket
Plant ties (I like the soft tape)
Bamboo steaks/poles

Structure:  Make sure you have something very sturdy like wood or metal.  I used landscape timbers that were planted two feet in the ground.  And then used porch railing as the cross bars.  Start your first cross bar one foot off the ground.  Then space the remaining one foot apart.


Tree:  Use a tree to fit the size of your structure.  I chose semi-dwarf because I only had a four foot width to work with.  I purchased my whips/trees at Willis Orchards they have allot of trees and great prices. And for this use you must get whips.  For my Espalier I planted Sugar Pear Trees.  When you choose make sure you check if the tree needs a pollinating Buddie.  Some trees will only produce fruit if they have another of the same species, it doesn't have to be the same type, its better if it isn't.

Getting Started:

Rest your tree in a bucket of luke warm water.  It needs a good long drink.

Dig your hole one foot away from the support.  Make sure your hole is twice the size of the root system.

Planting:
Plant your whip to the knobby base.  Do Not Plant The Knob.  Use the same soil that you removed and top dress with compost.  Make a moat around your tree so that the water stays around it when you water, you don't want it running off.

After your tree is planted cut it off  at the top of the first railing. (I know this is hard to do...its barely a stick)

Water it deeply and give thanks for all the wonderful fruit and beauty it will bring you.

You will start to see little buds that will grow into little tree arms.  choose two that will be your first horizontal branches, remove all the rest.  Attach the bamboo to the support with twine or plant tape.  Attach the branch to the  bamboo.  Your bamboo should be at a slight slant.  Just enough so that it bring the branch down a bit without going too far.  Right now you want it still growing up.  When it is horizontal the growth slows down, so don't bring it down to its support bar until it is almost at the length you want it at.

Allow the tree (center limb) to grow up to the second support bar removing any growth along the way that will not be your next horizontal branches. Cut off the top of the tree again...this will encourage the horizontal branches and the tree will start another bud for upward growth.  Choose branches that are level or close to level with the next support.  And do as you did for the first one.  continue this until you have met your desired height.

Continue shaping the tree.  Espaliers take longer to produce but when they fruit...OH YUM!

I hope I have made this easier on all my lovely gardening friends.  Try not to be as chicken as I was.